Saturday, December 31, 2011

How to spend a whole afternoon building a SIMPLE chicken roost.

I live on a farm with about 75 chickens or so. Not really sure. When I see a chicken I like I usually bring it home. One of the joys of not being married: Nobody to answer to!

I have an assortment of birds for the standard layers like Rhode Island Reds and White Leghorns to the more exotic like Polish and Sultans. Half  of these chickens are suppose to go to my daughters farm but more on the later.

Hey Matilda! Did you hear we are getting a new roosting rack???


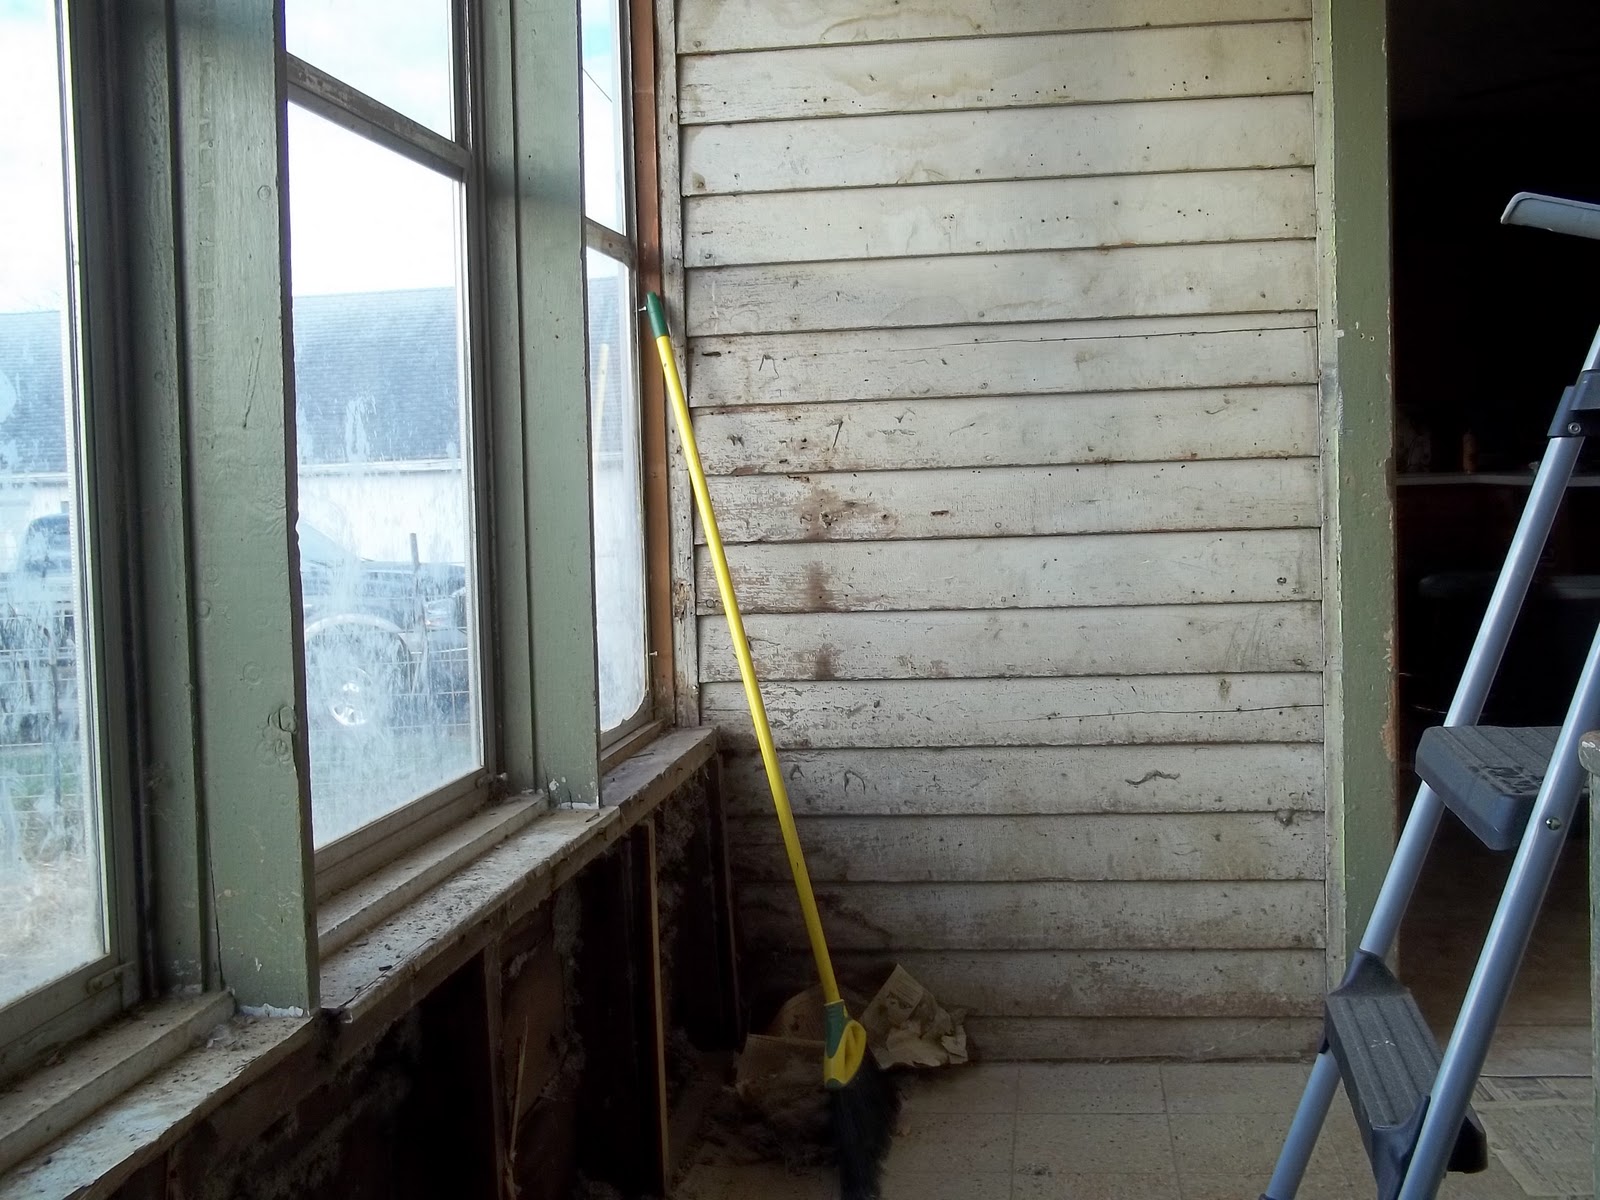
While I was out collecting eggs I noticed that the "roosting rack" that was in the coop was in pretty bad shape. It was an old picket fence panel I found on the farm turned sideways and put in the coop for the chickens. In case you are not from a farm, chickens like to get up off the floor at night and roost, thus a roosting rack.

So I went to Lowes and picked up the material that I was going to need. That was 6 weeks ago. Earlier this week I started to build the roosting rack and this is how far I got:

That is 2) 2x4 pieces of lumber that I cut to the wrong length when I was framing the wall to put the windows (oops!) So I guess  they were not a waste. They are sitting in my Rockwell Jawhorse. I L-O-V-E this thing! I am usually doing things b myself and it is like having a 3rd person around. At this moment I realized I did not have a big enough Speed Bore bit. Crap. I finally pick up a 1 1/4 inch Speed Bore because I am using 1 1/4 inch dowel rods. Makes sense, huh?

So here is were I started today:


See the brand new bit in the CORDLESS drill?  Wellllll.......When I got first hole drilled I realized that I needed a bigger drill bit so off to Farm and Fleet I go! I go to the store and then I stopped by my daughters farm on the way home. Round trip time: 90 minutes

I get home with the spanky new bit which was 1 3/8 inch by the way only to find out:

My cordless drill, even with two batteries, could not drill 12 holes.  I needed a drill with a power cord and some torque. I sent Big L in town to pick up a drill at my work. (I own the company so it is technically not stealing if I get it back before the shop manager, Gar-bear, comes in) Round trip time: 45 minutes.

So now I am off and running! You drill the holes in the 2x4's:


See to nice big whole clean hole that the Speed Boar does?


 and put the dowel rods in so it looks like a ladder  I did use some wood glue and pinned them with some 2 inch finishing nails.


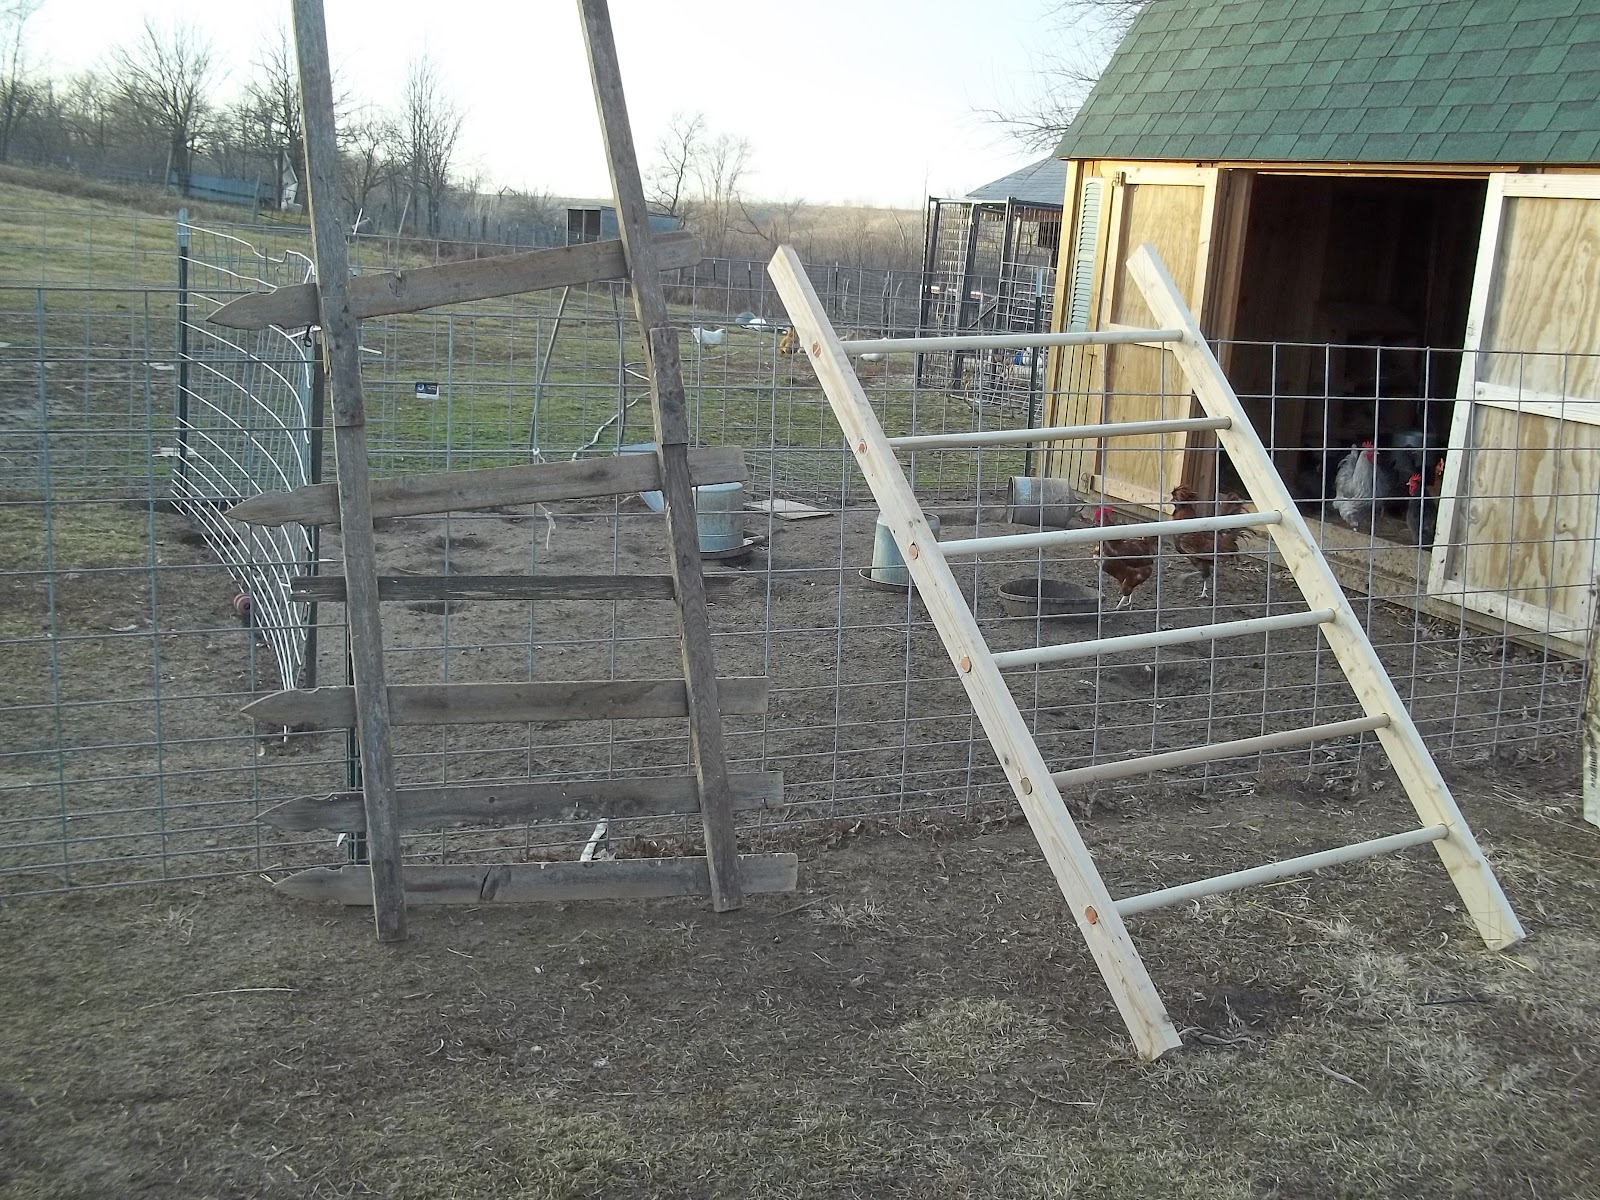
Before and After- Old roost on the left! New roost on the right!


And here are some of the chickens enjoying their new roost!


The chicken in the middle hates having her picture taken!

The bottom chickens are saying you can kiss my..........tail feathers.


Happy New Years!!!!!!!!!!!!!!


Thursday, December 29, 2011

Waiting and reading some kick ass blogs.

I am in the Midwest. It is the last week of December. It is cold and snowy warm and sunny. It is going to be 53 degrees here on New Years Eve day.  NO SNOW IN SIGHT. I know patience is a virtue but it's not my virtue so I called the Gitter Done boys and asked them if the step thing was going to happen. Here is how the conversation went:

GITTER DONE: Yep! some time next year.  (HA.     HA.      HA. Very funny). 

ME:  No, seriously, when can you guys come out. 

GITTER DONE: Welllllll it is suppose to 45 degrees today and more good weather next week so we are putting up a pole barn.

ME: How long is that going to take?

GITTER DONE: Oh..... I don't know. Around 10 days or so.

ME: Ummmm Okay. Well "we" are still going to do this moving the staircase thing aren't "we"??? (There is almost begging tone to this)

GITTER DONE: Sure, as soon as it gets a little colder out.

So I am at a stand still. Do I have crap to do around the farm? Yep. So I will probably fill my blog with mini projects and I am going to work around my me and daughters new farm. (More to come on that) But in the meantime check out these super cool blogs from Lady DIY'ers.


The name says it all! This blog is ran by Kit Stansley. She is now a licensed contractor so she has graduated from a DIY'er. She is also a guest writer for Bob Villa. I love her writing style and her sense of humor shines through. It is a great read and I think my BFF is secretly in love with Kit!


This blog is ran by a gal named Kristen and she lives in the Midwest. I love the fact that SHE CAN MAKE FURNITURE!!! So cool! I mean really cool. It is a dream of mine to make furniture someday.  I love her "step-by-step" style and simplicity of explaining things to the less fortunate skilled such as me. And she does beautiful work to boot! I recently email Kristen and she was kind enough to respond and I quote, "She has farm envy" LOL I laughed so hard I had tears running down my leg! After a week on the old goat farm she would have "I want to go back to my super cool house envy"


This is what Sandra says about herself:

I'm a crafter, DIY'er, home renovator and builder of "STUFF". We move frequently so I get lots of chances to buy a house and then tear it up so I can put my mark on it before we sell it and move again. I hope you'll join me on my DIY adventure as I start all over again.

Like Kit and Kristen, Sandra Blog is funny and informative. I haven't even touched the surface of this blog and I love it!

I love all three of the blogs and I am in awe when you can see what we, not only as women but people, are capable of if we only apply ourselves. (Yes I know that I totally sounded like my 6th grade teacher here) So indulge yourself today and check out these way awesome blogs and wait with me for old man winter to show up!

Tuesday, December 27, 2011

Discardia and a simpler life.

A while ago I stumbled upon a website called, "Discardia". I must admit that I fell in love with the name. But what is Discardia you might ask and how does it fit in a home improvement blog?

Well a brief description of Discardia is:

With its three key principles and numerous practical tips, Discardia—a new holiday—helps you carve away the nonsense of physical objects, habits, or emotional baggage, and uncover what brings you joy. You can find the website here.

How does it relate to home improvement?

I believe that ridding your home of excess clutter (i.e. JUNK) is type of home improvement. It may not involve lumber, hammers, a drill and screws but you are improving your home. When you live in a home that is neat and free of clutter it just makes you feel better.

It is like when you go to an open house of a new construction home. It is staged so beautifully and there is no evidence of real life there. (Like my teenage sons underwear on the bathroom floor) It is neat and clean so invokes really good feelings. So do we really want a new house or do we want what we have to be neat and clean. Have you ever cleaned your house super good and you didn't even want to leave because you just wanted to stay home and enjoy the fruits of your labors. Same goes with cars.

I have an obsession with the Amish. What I love about the Amish is their simplistic life. I do not want to be Amish because living without electricity would suck. I mean like really suck. Bad. But when you look at the Amish as whole they have only have the possession that they need. No more-no less.
Amish Bedroom


Amish kitchen


I am sure as much as much as I believe that this would be the best way to live I am also sure I would have a HUGE culture shock without the modern comforts of home and my "stuff'. This get me thinking about how much of my stuff I could get rid of and do without.

It is not like my place is a candidate for the show Hoarders and if you ask my friends they probably would not call my place cluttered but I could stand to eliminate some "stuff" out of my house.


WTH???????????
Really????
Can you see the difference? I am not making light of the hoarders. They have a real problem, but when our closets are bulging with "stuff" I think we have the same problem on a smaller scale.
So while I wait on our first major show storm to get the stairs moved in my house, I will be practicing a little Discardia and trying to achieve a simpler life. I think it is a great New Years resolution.
If you are looking for more inspiration check out my buddy Miss Effie who had the same revelation the same day as me! Great minds think alike I swear.

Monday, December 19, 2011

I H-A-T-E my stairs!

If someone were ask me what I don't like about my farm house I could have a list as long as my arm. It could be the 70's paneling or the carpeting. Maybe it could be what I call the "George Jetson kitchen cabinets" (Not all custom is good.) Old wallpaper, plaster falling down, lack of electrical outlets, wet basement, no heating/cooling upstairs, every window but the new ones I just put in are broke.............. okay I am going to stop here because this is getting kind of depressing and you get the idea. All the things that I just listed are just a mild annoyance compared to the stairs that run up through the middle of the house separating the living room and dining room with beautiful 70's paneling. So maybe I don't hate the stairs as much as I hate the chopped up floor plan.

I was talking to my BFF about this and he assured me that I could move the steps. He also assured me that I could do anything I wanted if I throw enough money at it. Nice. Now I am all about doing things myself but knocking down an interior wall that used to be the original exterior wall of the house is a little beyond my skill level. The thought of the second story crashing down on the main floor causes apprehension.

So enter a couple of local boys that own a company called "Gitter Done" (no joke) I have known the Gitter Done boys for a long time and they do good work. They are fair and fast. A good combo. They came out and looked at the stairs and they also assured me that they could move the stairs for about $2500.00. I just sat there dumbfounded. Wow. $2500.00. Wow. That is A LOT of money. Wow. Sticker shock. More wow........crap. The fact that there was beer involved made it a little easier but wow.

But moving the stairs also opens up another possibility. I can put the access to the basement directly under those stairs for a stacked stair set up which is the most efficient use of space when it comes to steps. Then I can take out the existing the basement steps and add another 4 ft to the new laundry room. Now that has some WOW factor!!! Now I was on board with the Gitter Done boys!!!!! Hell yeah! Lets do this thing now!

Since the Gitter Done boys are so good they are in big demand. Right now they are finishing up with outside work and have promised me that they were going to the stair project when we get our "first major snow storm" That sounds great but we are having one of the nicest winters that I can remember.

I know waiting on the Gitter Done boys is going to delay my upstairs laundry room project but I think it is worth it . Right now there is not enough room to set the washer and dryer side by side. My daughter has graciously agreed to have Christmas at her house since mine is a little tore up right now.

So I shall patiently wait but as much as I want the stairs done I will NOT pray for snow.

Wednesday, December 14, 2011

Part 2- I can see clearly now because I have windows!

Okay, On Sunday night we left off with, the frame is up and I have OSB covering the whole wall.

Monday I cut the OSB to fit the wall and I needed to cut out the openings for the windows. I have to say that their is a lot of "armchair carpenters" in my life and they always start off with, "Here is what you need to do, (fill in the blank). One of the brilliant suggestions was:

GAR BEAR: Here is what you need to do, put up the OSB and take your reciprocal saw and cut out the openings for the windows. Just run it around frame and to should be good.

ME: I am not that good with the recip-saw. I think I should temporary put them up and trace around them and then put them on saw horses and cut them with a circular saw.

GAR BEAR: Oh hell! You will be fine!! Just use the recip-saw!

ME: Uhhhhh............ Well............ I guess I could try that............ but really I am not................

GAR BEAR: Trust me!

So I put up the OSB with a million 2 1/2 inch screws and get out the reciprocal saw and.... EPIC FAILURE. I am not strong enough obviously. DUH.

Take out the million screws, put the sheet of OSB on the saw horses and cut it with a circular saw.

*NOTE* What I learned from this little escapade was, trust my instincts and if someone is not willing to help then I have little regard for their opinion.

So this how Monday ended, Yeah I know I am missing something! like maybe windows????


Now fast forward to Tuesday afternoon with a BIG threat of rain coming in December of all things. I got home at 12:30 and got the windows unpacked from the packaging. Test fitted them. Big L started to silicone the flanges. I sent Cheeo to the garage to get some 2" roofing nail that I am sure I have. So sure that I didn't even check to make sure. I don't even need to tell that next I was going to town to pick up some nails do I? Yepper.  There is really not much more we need to say about that.

Here is how Tuesday ended and yes it was raining:


And here it is from the inside:


Ta-da!!!!!! So I know it is not done but I am supper happy with just getting the windows in!


Monday, December 12, 2011

Part 1- Window framing and no installation.

All the moon and stars lined up on Saturday to tear out the original windows, frame up the wall, and finally get the new windows installed. The weather called for a sunny 25 degrees and no wind. Perfect for opening up a big whole in the wall and exposing your house to the elements. I also had Plan B. Sunday was suppose to be nice also. Okay so I have 2 whole days to get this project done. More than enough time even if I have never done any of this before.

So here is what the storm windows looked like before:


All these are windows are basically single pane storm windows. The bottom left window is Plexiglas that was broken by this:


Finn (a.k.a. Tasmanian Devil, Marley in Marley and Me, Hooch from Turner and Hooch) While he looks innocent enough here,  you can trust me when I say he is NOT! See the zipper on the cushion on the right side? Well that cusion is turned around because Finn ate the couch.

Once we got out the storm windows and a the rest of the aluminium framing that was put in with 492 pounds of silicon. No shit. No less than 492 pounds. This is what it looked like:


What you cannot see in this picture is, The bottom sill was 4 1/2 inches so I had bought a bunch of 2x6's to rip down to meet the size of the bottom sill. I also picked up a few 2x4's just because you never know when you are going to need a few 2x4's. Well once I got the old windows cleaned out I could see that the bottom sill was rotted on both ends and I didn't feel comfortable using it. Soooooooo here is what the it looks like when you tear out the whole wall:


And here is what it looks like when you run out of daylight:


Remember Plan B? Well I was in full Plan B mode. It is now Sunday morning and I am going to start framing up "the hole" but now I want use 2x4's not the 2x6's I already have so it is off to Lowes I go and they don't open until 8am. It is 9 by the time I get back home and start working. I did get the framing done as you could see here:


And here is how my day ended. Not with windows but with more OSB:


I am still pretty happy with my progress and I know it always seems like "two steps forward and one step back" but I have no expectation of time frame and it is all a learning experience. Oh yeah! My helpers were my 19yo daughter, Cheeo and Big L the 15yo son. All of us with zero experience! :-)


Monday, December 5, 2011

Washers and Dryers and Softeners..............................OH MY!

It was Black Friday Weekend, Big L and I was at Lowes on Saturday just doing some general shopping for nothing in specific. While we were there I thought it would be a good idea to look at washer and dryers just to see which way the doors open so I could plan the placing of the mechanics of the room. I know I want Whirlpool because it is the leading MADE IN THE USA appliance manufacturer. It was inducted in the MADE IN THE USA Foundation Hall fame and you can see the full article http://www.prnewswire.com/news-releases/whirlpool-corporation-inducted-into-the-made-in-the-usa-foundations-hall-of-fame-125557918.html.  But here is a excerpt:


About Whirlpool Corporation
Whirlpool Corporation is the world's leading manufacturer and marketer of major home appliances, with annual sales of more than $18 billion in 2010, 71,000 employees, and 66 manufacturing and technology research centers around the world.  The company markets Whirlpool, Maytag, KitchenAid, Jenn-Air, Amana, Brastemp, Consul, Bauknecht and other major brand names to consumers in nearly every country around the world.  Additional information about the company can be found at www.whirlpoolcorp.com.


While we were there I seen a pair of Whirlpool Cabrio's on sale for $998.00!!!!!!!!!!!!!  That is $600.00 off!! But wait! These were not my "dream washer and dryer" This was a top load washer! WT????? NOOOOO!!!!!! I want to be new and modern and cool and hip and happening! I can't be all that with a top load washer! Everyone know that you need to a pair of front loads to be a part of the in crowd. The front load Whirlpool Duets (which is rated #1 by Consumer Report) were in the neighborhood of $2200.00 for the pair. Way more than I wanted to spend on a couple of boxes to wash and dry my clothes. Crap! So I bought the Cabrio's and top load washers are actually better at scrubbing clothes and you can also wash comforters.  As far as the dryer goes, I hang out laundry more days than I use the dryer. They were on back order so Lowes will be delivering them on Dec. 21, 2011. I smell a deadline here........................................ 


A while back my water softener took a dump. I haven't bothered replacing yet but living in the country with a 35 foot hand dug well there is a need for a softener and/or a water conditioning unit. I figured it was something I better call an expert about. I called to companies and here is how it went:


Company A: You have A LOT of rust (duh) in your water. You will NEVER get all of that rust out with just a softener. And you are going to need a reverse osmosis unit for drinking, blah........ blah.......blah...


 Here is what I recommend:


Water Softener-                $1595.00 to buy OR $15.95 a month to rent
Water Conditioner:           $2095.00 to buy OR $29.95 a month to rent
Reverse Osmosis:              (somewhere around $15.00 a month, not sure because I had quit listening by this point)


Company B: You have A LOT of rust (duh). Let's take a look at what you got and see what we can do.


After looking at the plumbing here is what we came up with:


Fix old softener and set it up with a different resin base for rust and clean up all of the old plumbing and make it work better. (Pics to come!)


Labor:   Approx- $1500.00 dollars and reusing (recycling) what I have.


Went with Company B and by the way these were both locally owned companies.

Saturday, November 26, 2011

Laundry Room: Before and During Pics

Woke this morning to a warm and balmy day. Considered putting the windows in today but as soon as I checked the radar I knew that was not going to happen. It looked like the rain was going to be here in an hour and when it started I was going to stick around for the whole day. So I went out to my workshop to get something and decided in that moment that I was going to finish the Buck Hut that was in the middle of the workshop so you need to walk around it every time you walk in.  Highly annoying. But the things never seem to go smoothly around here because there is always a chain of events that must happen before this happens, Like the following:

First I didn't get the Buck Hut done because I didn't have ONE piece of 1/2 plywood.

Then I didn't have the Buck Hut done because I was using the circular saw in the house and I had the blade set to the "perfect setting" to take out the floor in the dining room. I mean, you might never find that exact depth again.

I finally get the dining room floor out so I can take the circular saw back out to the workshop to cut the ONE piece of plywood needed.

Cut the ONE piece of plywood and finish the Buck Hut

Can't move the Buck Hut out of the work shop because the tractor has a flat tire.

Need to walk all around the farm looking for the air compressor to fill up the tire.

Found the compressor and aired up the tire......................finally.

MOVED THE BUCK HUT!!!!!!!!!!!!!


So I put the miter saw and stand together which I am pretty sure certifies me as an aeronautical engineer. (I had to use the directions) That is 2 hours of my life I will NEVER get back.


Here is some before pics of the mudroom that it going to be the laundry:


But look what I found under the 1/4 laminate that was nailed to the wall:


It is the original clap board siding  on at least two walls and I am thinking I am going to keep it and incorporate in my decor by cleaning and painting it so it will have a "porch like" feel. It looks really cool. Leave a comment if you like it / hate it .

And finally for my friend Miss Effie. Here is some thing for our Pinterest board! It was taken in Kalona IA and I thought of you!


Friday, November 25, 2011

Turkey and Tools

THANKSGIVING DAY:

When I was growing up, Thanksgiving was a special holiday second only to Christmas and my mom always hosted the dinner. She planned it for a weeks and we literally cleaned the house the whole week before because after all you couldn't let people see how you really lived. The day of the event everything was in place and the whole family was in their Sunday best. The Grand parents came also dressed to the nines. There were relish trays and drinks beforehand and the meal itself was a sight to behold. Oh those were the Norman Rockwell days.................

Fast forward to Thanksgiving 2011. Let me set the scenario for you. It is 60 degrees and beautiful out! I am hosting Thanksgiving dinner like always. I decide that TODAY would be a good day on starting to put windows in. I mean after all, did you catch the part about the kick ass weather we are having in the Midwest??? So I get up and start tearing apart the sun room. I mean really how hard could it be to get those windows out and the new ones framed up and slapped back in? Well let me tell you how it went:

Worked from 8 until  11:50

The neighbor stopped down to borrow some orange snow fence at 11:50. (I might have BS'ed too long)

The turkey got in at promptly 12:47pm. (47 minutes late)

My mom shows up at 1:30 (an hour early)

My kitchen and sun room looked like a tornado had hit (think F5 tornado)

I ate my basic Thanksgiving dinner unshowered, in sweats and a T-shirt with the sleeves cut off. (very sexy if you have never seen the look)

The food was awesome. (but so much for the days of the Norman Rockwell settings).

Windows not in. (Shit! but that is okay because I spent the morning listening to and thinking  fantasizing about Jason Aldean. )  

The good news is, I found the old clap board siding underneath the 1/4 laminate they had nailed up to the wall. I am seriously thinking about keeping it and cleaning and painting it: It looks very nostalgic and I think it would work in a laundry room, pics to come.

Monday, November 14, 2011

Odds and Ends


A few years ago I paid off all of my credit cards and I have never used a credit card again and never will. I am a big fan of Dave Ramsey and if you don't know who he is, check him out! He is all about being debt free. When I made the decision to pay off my credit cards, I had to not only make extra payments to pay them off but I also had to pay cash for everything that I needed. I the pain was akin to getting your teeth pulled without and novocain. No joke. This was 2 years ago and I still remember it like it was yesterday.

Now that I am renovating "The House" I think it is going to be a lot like paying off the credit cards. I will have to do that extra work to make the renovations happen, and at the same time keep up on the normal things that need to be repaired that is an ongoing problem with a 125 year old farm. I am up for the challenge.

Now with that being said............................


The miter saw is here! The miter saw is here! Oh it is like Christmas in November and............ the windows are here!!!! That is the good news!

But here is the bad news: I have like 3 projects that are started but not yet finished. In this order:

1) Buck Hut is NOT done. (Can you believe it? Me either)
2) Flooring in dining area in not finished (What? it has only been 2 months since I started this project)
3) Barn door needs to be repaired and rehung. (1 hour repair- 1 measly hour..............)

While I was thinking about this I was trying to think of some good excuses of why I haven't got this done. I have everything I need to do these but the tin to do the buck hut roof. Unbelievable. So with that being said, I have made it a G-O-A-L to get these 3 things done this week because Big L is off school next week for the holiday. I want to start re framing the window area while he is off.

I thought by writing this down it would help shame motivate me into getting it done. We shall see. I think I will go to Menards and pick up my windows and some tin up this afternoon. Maybe that will help motivate me more.

Monday, November 7, 2011

Buck Huts and other farm ramblings

Winter is coming. You can't stop it. Living on a farm puts a whole new twist on winter. No matter how much I prep for winter it always seems like it creeps up on me and bites me in the butt. Oh I know the falling temperature, leaves turning a different color, then falling completely off the trees and daylight savings time should all be a big clues that winter is coming but winter always seems to "show up" catching me off guard.

One of my fall projects was building a Buck Hut. What is a Buck Hut you might ask. Well a Buck Hut is a low 3-sided lean-to that houses the boy goats on the farm. I build one last spring but there is a definite to need to separate the older boys from the younger boys because the older boys thinks the younger ones are their "girlfriends", if you know what I mean. So I framed it up a couple of weeks ago and here is how it has sat in my garage:


NOTE: ALL FARM PROJECTS MUST INCLUDE A CAT.

My son went out to the barn and got some RB&B (Reverse Board and Batten) and plywood. I was HYPED to finish my project! I got all the sides done and 2/3 of the roof done and ........................... I ran out of 1/2 inch plywood. So I was in the garage mumbling cussing about the plywood when my 16 year old son who we shall call Big L (more protecting the innocent) came in and here is how the conversation went:

Big L: What's wrong?

Me: I need some more 1/2 plywood. Go check the barn and see if I got some more.

Big L: I already looked and all we have is RB&B and 1/2 inch OSB (oriented strand board)

Me: You sure?

Bid L: Yeah, I had to dig to get you the plywood you got. Just use the OSB. You are going to put tin over it anyway. What makes the difference?

Me: I don't want OSB. I want plywood.  I will just go look myself. **This is where I stomp off to the barn and come back to find Big L smiling like the Cheshire Cat**


(example of Big L's shit eating grin)

No Plywood. Crap. Epic Failure~ BUCK HUT NOT DONE! How do you have a barn full of misc wood and NOT have 1/2 plywood????  So today I will be getting some plywood and tin to finish the Buck Hut.

On a positive note I was thinking I was going to have to power wash the Buck Hut before I painted it but tomorrow we are suppose to get 3 inches of rain and high winds so I think I will let mother nature take care of it.


Friday, November 4, 2011

Let the tool buying began!!!!!!!

I knew I was going to have to buy an arsenal of tools when I started this project. Hand tools and power tools. I do have some tools but my tool chest is very hit and miss. I wrote a couple of blogs ago buying MADE IN THE USA. Well, bad news, there is no power tools MADE IN THE USA. This saddens me very much but I have gotten over it and moved on.  If someone finds out any thing different please leave a comment.

So I will be buying tools based on reviews and my BFF'S advice.

**SIDE NOTE- My BFF (Best Friend Forever) is a 40 something guy that is not a professional carpenter but did put a full 2nd story on his 1 story ranch and he did it working around his full time job.

Here is the power tools I have:

  • Craftsman table saw
  • Skil circular saw
  • Black and Decker cordless drill with 2 batteries
  • Portable air compressor
Here is my wish list so far
  • Makita 12" Dual Slider Miter Saw (LS1216L)
  • DEWALT 10 Amp Reciprocating Saw (DW304PK)
  • Paslode Cordless 16 Gauge Finish Nailer (900600)
  • Paslode Framing Nailer (cordless)
  • Hand held Router- (???)
  • Dremal (4000-6)
I have been on the hunt for a miter saw and based on several reviews I have settled on Makita with a price tag of $599.00 . You can see some of the reviews here. This Old House Magazine calls this the "must have miter saw" You can check out the review if you would like and I won't bore you with all the details.

I went to  Home Depot, our local Makita dealer, and of course they did not have what I was looking for so I turned my search to online. I found what I was looking for on EBAY. (Imagine that) but I got more than I was planning on. Here is what I bought:

Makita 12" Dual Slider Miter Saw with folding portable stand
It kinda gets your juices flowing don't it????? The price tag was $799.00 with NO TAX AND FREE SHIPPING!!!!!!! This combo was $849.00 plus tax and shipping through Home Depot.


While I was on the black hole called EBAY I also found this:


I got this little gem brand new for $247.00 plus $10.99 shipping. This list at Lowes for $349.00 plus tax. So that is a savings of about $100.00 not to mention my time and fuel.  AND-Sales tax saved @7.25% was $75.83

So now I wait for my windows from Menards and my tools from all over the country to arrive and while I wait I will be doing demolition on my new laundry room. Pics to come this weekend.


Tuesday, November 1, 2011

Last years office renovation. Before and After Pics

The winter of 2010/2011 I move to from office in the back to the "big front office" in the fron. While it was empty I decided to "just hang a little drywall and put in some new floor".  So with the help of my BFF, a Layed Off Electrician, and Gar-Bear (names have been changed to protect the innocent) we did this remodel below.

This renovation went WAY BEYOND hanging a little drywall and some new flooring. New ceiling $$, recessed dimmable pot lots $$, recasing of all the windows,$$ new blinds $$, trim. $$.........$$$$$$$$$$$$$$$$. It might of got a little out of hand.

After seeing the transformation of the old office to new I am confident that there is hope for the old girl I call home. I set this a a separate page so I can refer to it.


The Office Before. As you can see the 70's was not kind!


The Office After. More better-er!


Saturday, October 29, 2011

Gotta have a plan!

When I decided to rehab "The House" I thought it would be best to do one room at a time starting with something that would give me a pretty big bang for the buck.  Like a lot of people that live in an older home, my laundry room is clear down in the basement and I say it like that because we all act like walking down 13 steps is going to kill us. Actually it is not walking down that is the killer it is the walking up that will do you in. Since I live on a farm I have a really cool contraption called a solar dryer (clothes line) that I religiously use during favorable weather. That means I am walking up the stairs with a clothes basket, that you can not see over, full of wet laundry and can be quite heavy. I mean it is not like you are heading down to the creek with a rock and a washboard but it is still a pain in the.......

I am moving the laundry facilities to a little sun room that sits right off the kitchen. The room has 3 windows that measure 30x58. When I was searching on line for windows I could not find and exact fit so I thought I will replace the 3 windows with 2 windows that measure 36x54 and just do a little reframing. I did not want to pay for custom windows. There is a 32" door plus a screen door that needs to be replaced. I will have to run plumbing and 220 electric to the area which should not be too bad since the basement laundry room is almost directly below the new laundry area. A new washer and dryer is also going to happen even if I have to sell plasma to make it so.

Yesterday I head off to Menards to order the windows. I printed off the info sheet that I got online so there would be no questions about what I needed then I preceded to leave it set on my desk and go to Menards without it. Not one of my brighter moments. I get to the mill works desk and tell Raymeo (no really, that is his name) what I am looking for but I forgot the all important info sheet. Raymeo tells me not to worry he will find it on the computer. I am being really nice to Raymeo (who has a faux-hawk) because I think I will be seeing alot of Raymeo in the future. He ask me a few key questions, size, color, and hard wear choice then tells me it will be $468.00 a window.

WHOA RAYMEO! WT?? NO! NO! NO!  Wait just a minute Raymeo you need to back up the bus!  I seen those windows online and the were $255.00 + Uncle Sam!


Well Raymeo, who now very scared of the crazy lady sitting across from him, gets online and finds my $ 255.00 windows that will not be here until Nov 18. He helps me pick out a nice exterior door and screen door and was fine again.  Did not get the doors because I wanted to double check the measurements.

I am sure Raymeo is referring to me as that "crazy bipolar lady"

Total cost for 2 windows- $548.25  *and no residual shopping! The ONLY thing I bought was the windows.

Wednesday, October 26, 2011

Decisions, decisions.

You know, somebody doesn't wake up one day and decide to do a full remodel on their house. It just don't happen like that. What happens is you live in a house and little by little there are things that you want to change. I could be something as little as the color of the wall. May be it is putting down new carpeting because, as close as your '70's shag looks like the new age frieze carpeting, it is not. It could be something as large as putting up a room addition. Nope it probably something you have thought about for a while.

Since I have been thinking about this for a while (like 3 years worth of thinking) one of the things that I have decided is I am going to try to use as much MADE IN THE USA as feasible. We all talk about how we should buy MADE IN THE USA but usually the decision boils down to money. But I believe that there are comparable products for about the same money and it just takes time to do the research. This decision also goes for tools, so my beloved Kobalt brand from Lowes may be on the chopping block for future purchases. Not sure how that is going to play out yet. Do I believe that ONE person can make a difference? Yes. Everybody in America is ONE person. Everybody, ONE person at a time, can make a difference. Just my thoughts.

Here is the windows I have decided to put in and will be ordering from Menards tomorrow:


And here is the description. Pay close attention to the last line. (I put it in bold so you can't miss it!)

36" x 54" Acclaim White Fiberglass Double Hung Window with Zo-E Insulated Glass & Pine Interior

  • 500 times more efficient than aluminum
  • Eight times stronger than vinyl
  • Stable in temperature changes
  • Clear pine interior
  • Tan Finish Hardware
  • UNIT FRAME SIZE = Rough Opening Width -1/2" & Height - 1/2"
  • Unit Size = 35.5"W x 53.5"H
  • Lifetime Warranty
  • Made in USA
I have decided to go with the fiberglass/wood window because they are a better product than vinyl. Plus, I like the way the look and they are on sale at Menards this week! They are normally $329.99 and they are now $255.00 for a savings of $74.99!!  I am going to take out three windows and replace them with two windows. Pictures to come!

Also, my buddy turned me on to a really cool site. Check this out: http://www.diydiva.com/ Awesome!!!!!!!!!!!!


Monday, October 24, 2011

The 3 year drip..... drip........ drip........

I woke up on Sunday morning and was fixing breakfast. I looked over at the sink while I was cooking and the faucet was doing its drip...... drip...... drip....... That same scenario for the last 3 years. In that moment I decided today would be "fix the sink day" I mean after all, it has only been 3 years. What's the hurry?

I figured I had 2 options-

1. Change the faucet- (been there and done that but not a favorite and is costly)

2. Fix the broken parts- (never done that but the cost had to be better)

Faucet Valve (the culprit)


Obviously fixing it was the choice! The problem was the left handle would turn past its stopping point thus water never being totally shut off.

My faucet had shut off valves which was going to make my job so much easier.  I tore it apart and pulled out the valve stem and yep, it looks like it was broke.  I took the valve to Lowe's and found a match! YESSSS!!! This was a good start. The valves were about $7.50 a piece. I decided to replace the cold also, because it was not if, but when, it would it was going to break. Then I bought and addition $60.00 worth of "other stuff" at Lowe's. Isn't that how it always goes?

Back at home I worked feverishly, at a moderate pace on the faucet. It took me about a half hour and minimal frustration. Then I turned the faucet shut off valves on and ............. What the ??? Crap! What the ??? The hot water (left) handle was fine. ON- OFF- ON - OFF! Good. It worked fine. But the cold, which was NOT broke to begin with, was backwards. You had to turn the handle away from you to turn it on and back toward you turn of off. Now cussing I took the cold valve out which proceeded to fall apart which made me cuss all the more. I got on my Blackberry and Googled my problem but Blackberry and 45 year old eyes are a bad match. No help there. So I put the valve back together without knowing what I was doing and was going to put it back in the faucet just so I had water. After I got it in the handle worked properly. What the???? That is all I questioned it because the end result is that it worked. Evidently you have to "switch something around in the valve" to make the handle work clockwise vs counter clock wise. hummmmm

Total cost: around $15.00


Thursday, October 20, 2011

Farm Girl vs Farmhouse, a little background.

In 2008 I begin looking for some land to buy because I was tired of living in the suburbs. All I wanted to do was have a quiet existence with a few horses but I quickly realized that most 5 acre "farmettes" were out of my price range. I was not deterred and I kept looking. I also had criteria but I tell you picky and small budget do not go together!

One day me and a friend of mine were heading to town and we seen a signs that read:

FARM AND 15 ACRES
FOR SALE 309-555-XXXX

Really???? Could it be???? I drove down the dead end road (one of the criteria) but I could not find it so I went back out to the highway and called the number. A nice old lady answered and give me directions (yes- I needed directions on a dead end road)

When I got there the owner gave us a tour of the place telling how her husband had died 6 months earlier died and the old farm was too much to handle. She had planned to take 10 acres of the 25 acre track and build a house down the road.

Well I was IN LOVE! The farmstead was about 125 years old with a house, an old post and beam barn, and a big garage. I knew it would come with a lot of work too because it had not well maintained for many years.

I looked at it on Sunday and I put in an offer on it on Monday, less that 24 hours from the time I saw it. Then I told my kids that we would be moving to a real farm. Within a year we had a farm with horses, alpacas, chickens, peacocks and goats. (We now raise Nigerian Dwarf goats to keep our tax ag status.They are a miniature dairy goat and I am sure you will hear more about them later.)

The plan was to tear down the house. Now it was not a bad house, I mean after all it is shelter. Basic shelter. No frill shelter. Drafty shelter. The kind of shelter that has made think, time and time again, on how our pioneer ancestors made it. Yep the house had to go.

I had big dreams about building a brand new house with all the bells and whistles. I big fine grand house! The house of all houses that would be envied by all my peers! Oh what a beautiful house that would be!

The I was at the county courthouse doing some research on "The House" and I stopped by the assessors office to ask about how much my taxes would be if I build this beautiful home. I currently pay around $1500.00 dollars in taxes and if I built the big fine house they would be $6500.00. Now I know someone had lost their ever loving mind because I was NOT going to be paying that much property tax. Hell, I don't want to pay $1500.00.

Time to get me a new plan. I have some skills and better yet  I have friends with skills. So I decided to remodel "The House" one room at a time and I also thought it would be fun to blog about it so I would have some sort of documentation if I ever get done.

This picture was taken while the previous owner was still living here.  Yes, I was stalking the house.


 Here is the old girl close up.